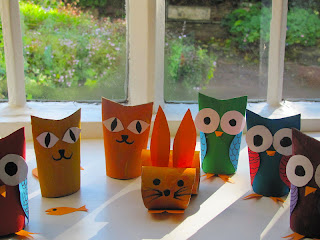
I thought we'd give our Owl and the Pussycat tube creations a spooky, Halloween twist. Very easy as it turns out, because they're a perfect shape for bats with those pointy little ears. So, time to gather up more toilet rolls...never imagined I'd be this happy to run out of loo paper...
They're made in exactly the same way as the owls and cats - gluing the top of the tube shut by brushing a good layer of craft glue inside the tube end, and using paper clips to hold it in place while the glue dries.
But this time paint them black, and when dry, cut a curve into the glued end and trim a few cms (1in) off the bottom (squeeze the sides together near the bottom and cut across the tube).
Draw and cut out eyes and fangs - I went for evil, grinning, vampire bats, but up to you how scary you want them to be!
I made half a bat wing using card, then folded some coloured paper, put the template on the crease and drew around it, before cutting and opening out the wings. Glue everything in place.
Next - time to get these bats up, and flying about.
Now due to the run on toilet rolls, we were just short for a bat-only mobile - so we made some ghosts to join them. They are very quick and easy. Cut a cup out of an egg box, brush glue all over the outside of the cup and stick the flat base in the middle of some white tissue paper (fold it double so it's not too thin). Hold it down with a loose elastic band while the glue's drying. Draw a haunted, ghostly face on one side. Cut the bottom in rough zig-zags, to make it look like a raggedy old sheet.
The mobile is just two wire coat hangers bound together at the top and bottom with some thin, pliable wire (or you could use string). I removed the top part of one hanger with wire cutters. Then cover it all with stretchy, creepy cobwebs and spiders - great stuff and easy to pick up in the supermarket around Halloween. I used some transparent thread to hang them up, but ordinary is fine too. Thread a needle and make a hole through the top of the ghosts, attach the thread underneath with sticky tape. Make a hole between the bat's ears with a threaded needle and tie a knot.


