9.8.17

Sunflowers - simple summer crafts for kids

sunflower craft

This is something I’ve been thinking about doing with the kids for a while, and seeing as we’re in France surrounded by sunflowers it seemed like a pretty perfect time! 
Surely it’s impossible to ever tire of fields of sunflowers? Stretching way into the distance, like a sunny bright, cheery yellow sea.

This is a quick and easy project - you'll need:

Paper plate
Brown paint ( or red, yellow and blue to mix)
PVA glue
Dried lentils (or something similar)
Sheet yellow tissue paper
Scissors

1. If you don’t have brown paint, mix red and yellow to make orange, then add a small amount of blue until you’re happy with the shade.
Mix your brown with an equal amount of PVA glue (we mixed them in an old yogurt pot)

Paint the middle part of your paper plate with a good, thick layer of your gluey paint, then sprinkle liberally with dried lentils (or something similar from the kitchen cupboard) and leave to dry.


3. While that’s drying, fold a sheet of tissue paper over a few times to make a strip (roughly 5cm/3in. wide) Snip the end into a good ‘V’ shape for the petals and cut off. (Use the folded pieces cut away from he sides too, if they’re a good shape)


Snip the petals a part if any are still joined together.

4. Brush glue around the rim of your plate and stick the petals down. You could do one layer only, overlapping as you go. (If you go for this option, we found it looks better if you cut away part of the rim first, so you don’t see it between the petals.)


OR. don’t overlap the first layer of petals, space them out evenly instead, and add a second in-between, to fill the gaps. Just dab a bit of glue at the base of the circle of petals. Add a third ring of petals too if you want.


Two of my not so little sunflowers!


25.7.17

Shell hedgehogs and other animals - simple summer crafts for kids


We thought we'd share a few simple craft ideas that are fun to do during the summer holidays, whether you're home or away. There maybe a few Star Wars/Batman projects in the mix too, but even these don't need much planning, or a suitcase of craft supplies!

This one definitely doesn't,  just slip a Sharpie (other permanent markers are available..) into you bag and you're good to go!


I love collecting shells - happy memories of summers spent with my family on a beautiful beach near Tyrella in Northern Ireland. I'd walk slowly along the tideline with my head down and my eyes fixed on the scattered shells washed up by the sea. There was always plenty to choose from, but what I really wanted to find was a cowrie or a pelican's foot, because there weren't so many of them. It was like finding treasure when you did.

I think I've past this love onto my daughter, judging by the buckets and bag full of shells that come home after beach trips. We have made all kinds of shell creations with a trusty tube of UHU glue - the shell lady and little baby in a pram are ones I used to make with my Mum.


These are even easier - really just a case of looking at the shell shapes and seeing what they remind you of. The little hedgehogs are made from dog whelk shells which are common on UK beaches.

Simply squiggle and scribble on the main part of the shell with your pen, as far as the first natural groove near the pointy end.


Once you're happy with the squiggly back, draw a nose on the point, 


put it down on a flat surface, and dot eyes either side of the nose.  


That's it! So quick. We made a hedgehog family in minutes.

Limpets made good lion heads too!


Once we got going, the kids had heir own ideas. This is the best kind of craft session for me, when you see their imagination click in.


These needed a squeeze of glue to stick the heads to the bodies.


We only have a black Sharpie away on holiday with us - you could have a lot of fun with colours if you have them. I drew this peacock on a cockle shell a while back.


Hope we've given you some ideas for your next beach trip!


13.7.17

Cardboard tube fairy - easy crafts for kids


We’re on a bit of a roll with toilet paper tube crafts… corny pun aside, we have been pretty busy with our hoard of cardboard rolls. 
And like many of the other recent projects, Mary the fairy was inspired by the tubescapes we made a few months back. One idea often leads to another and I really love that. 
She is easy to do, great scissor practice, and can be made from just one tube - that’s wings and head too.

You’ll need:
Toilet paper tube ( or kitchen roll shortened to about 10cm/4in.)
Pencil
Ruler
Scissors
Glue
Sticky tape
Paint
Coloured felt tip pens
Black felt tip or gel pen
Glitter, sequins, stickers (optional)

1. Flatten the tube with your hand and about halfway up, draw a pencil line straight across using a ruler. Draw another line about a cm or so (1/2in.) up from one end.


2. On the other side of the middle line, cut at an angle from the end of the line to the top of the tube, but not quite as far as the corner. Keep the triangle shaped piece for the wings. 


3. Cut along both pencil lines from the shorter side, leaving the last cm (1/2in.) uncut, and then fold the middle piece of card over firmly, before cutting along the crease to remove it. Keep this card too, for the head. Squeeze your tube open, and you have the base for your fairy. 


4. Make her dress less pointy by trimming the sides. 


5. Take the piece of spare card leftover from forming the fairy’s legs, keep it folded and draw a curve on the folded end, for her hair. 


6. Cut out and open up. If it looks too big for her body, fold again and trim until you’re happy.

7. Use the card you’ve just cut away to draw a semi-circle shape for the face, using a straight edge of the card (on its side it looks like a capital D). Cut this out but don’t glue to the hair until all the pieces have been painted.


8. Take the spare piece of card from the start of the project, and cut along the crease so you have two triangles. These are going to be your fairy's wings.


9. Paint all the card pieces any colours you want. Make a good flesh shade by mixing a little red with white to make light pink, then a tiny touch of yellow and blue.


10. When the paint is dry, glue the face to the hair.

11. Flatten down your tube and draw shoes with a felt pen and draw on the face. 


12. Glue the head to the top of the body, and then use sticky tape to attach it firmly behind. Use the sticky tape to attach the wings to the back of the body too. 


Decorate with glitter, sequins or stickers, if you want your fairy to sparkle! 


16.6.17

Little cardboard tube houses - crafts for kids

cardboard houses

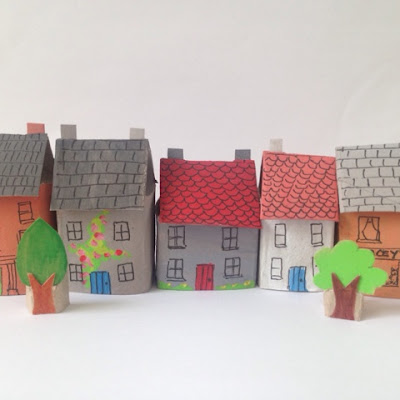
These little houses are really easy to make and you can decorate them absolutely any way you like! You could add them to the city scene we made last time, or make a village or town of your own, with different shops and houses. Have fun creating a scene!

All you'll need is:
Cardboard tubes
Pencil
Ruler
Scissors
Paint
Craft glue
Paper clip (optional)
Fine black felt tip or gel pen


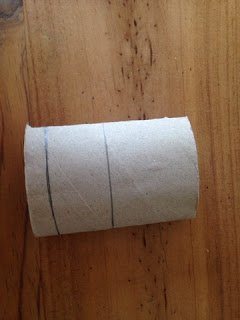
1. First of all you need to make the tubes less tubey, as we did with the city scene, so flatten one with your hand and press firmly along the two creases.


2. Open the tube up, and line up the two creases you've just made - the flatten the tube again, making two more creases. Press firmly along these as well.


3. While the tube is still flat, use the ruler and pencil to draw a pencil line across it, 3 to 4cm (1in. to 11/2in.) from one end. This will be the height of the walls.  If you are going to make more than one it would be good to vary the size and to use tubes that are different widths too.

Draw another line across, about 3cm (1in.) up from the first line. This will be one side of the roof and again the size could be altered if you want a taller, pointier roof or a flatter one.


4. Open up the tube and flatten it again, so you can see the pencil lines you've just made and it's easy to extend them. Do this one more time so the lines go right around the tube.


5. Cut down each corner to the first line you made near the bottom, and fold back the flaps firmly.


6. Cut two opposite flaps off, along the fold. Keep one spare piece for the chimneys.


7. Cut another one off too, but not right to the fold this time - leave a very small section of the flap so you can attach the roof here later.


8. Fold the remaining flap back on the second pencil line. Fold it right back so you can measure it against the other side of the roof, and cut any extra card away so both sides are roughly the same size. Then bend the roof fold the other way. Your little house is taking shape!


9. Paint the walls and roof of your house any colour you like, or you could leave it plain. Paint a spare piece of card from earlier the same colour as the walls, if you want your house to have chimneys.


10. When the paint's dry, use a fine black pen to add doors and windows to the side with the small flap. Add roof tiles too if you want, and use felt tips or paint to add any colour detail you fancy. We put flowers along the front of some of our houses and tried a rambling rose too.

For a chimney or chimneys, cut a thin strip from the spare piece of card you painted, and cut in half.


11. When you're happy with your house, brush some glue on the short flap at the front (if your glue isn't very tacky, use a paper clip to hold the card together while it dries. To make tacky glue, leave some PVA  uncovered in an old jar or yogurt pot for a day or two. This should thicken it up. Very handy if you want things to stick quickly and not to slip!)


12. To add chimneys, make small cuts either side of the crease on the roof top - or just one if you only want one chimney pot. Put some glue on the bottom half of your chimney, and slot it into place. When you're happy with the height, stick the gluey part to the underside of the roof front and bend the chimney(s) into position.


Have fun creating your own houses/cottages/shops/schools! You could add a few trees from the city scene project too.

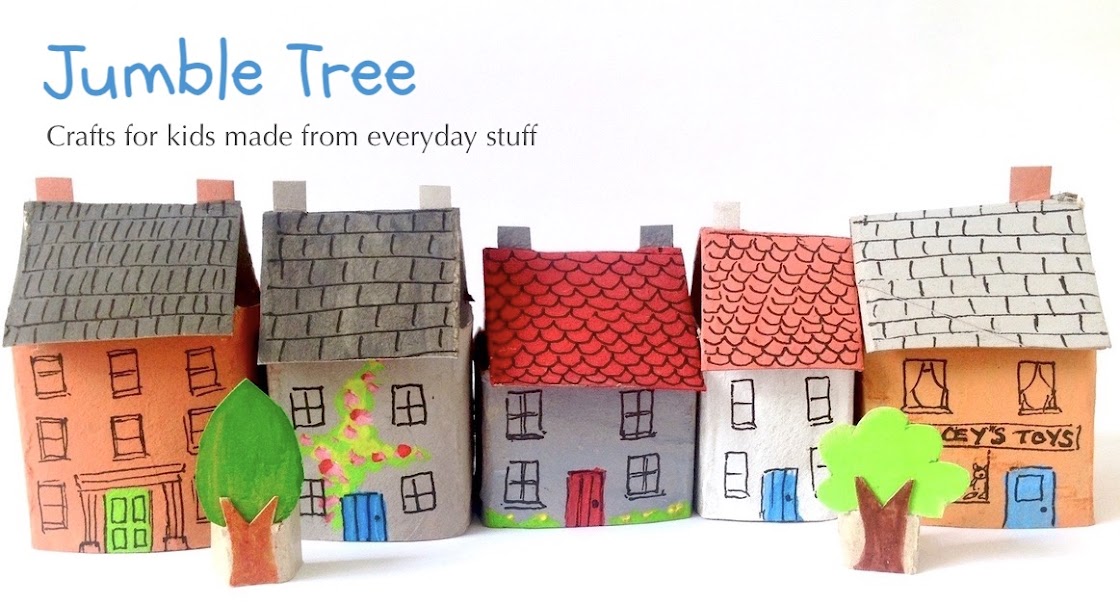
cardboard tube houses